Sunday, March 16, 2014

Building a Dollhouse, Part 3

There's been a lot of progress on the dollhouse in the past few days, so I'm back with another update. The first order of business was to get the roof on. Here, the main roof and the front gables are being glued and nailed in place. Nails in the front were countersunk, then I filled the holes with joint compound, and once dry, I sanded and touched up the paint.


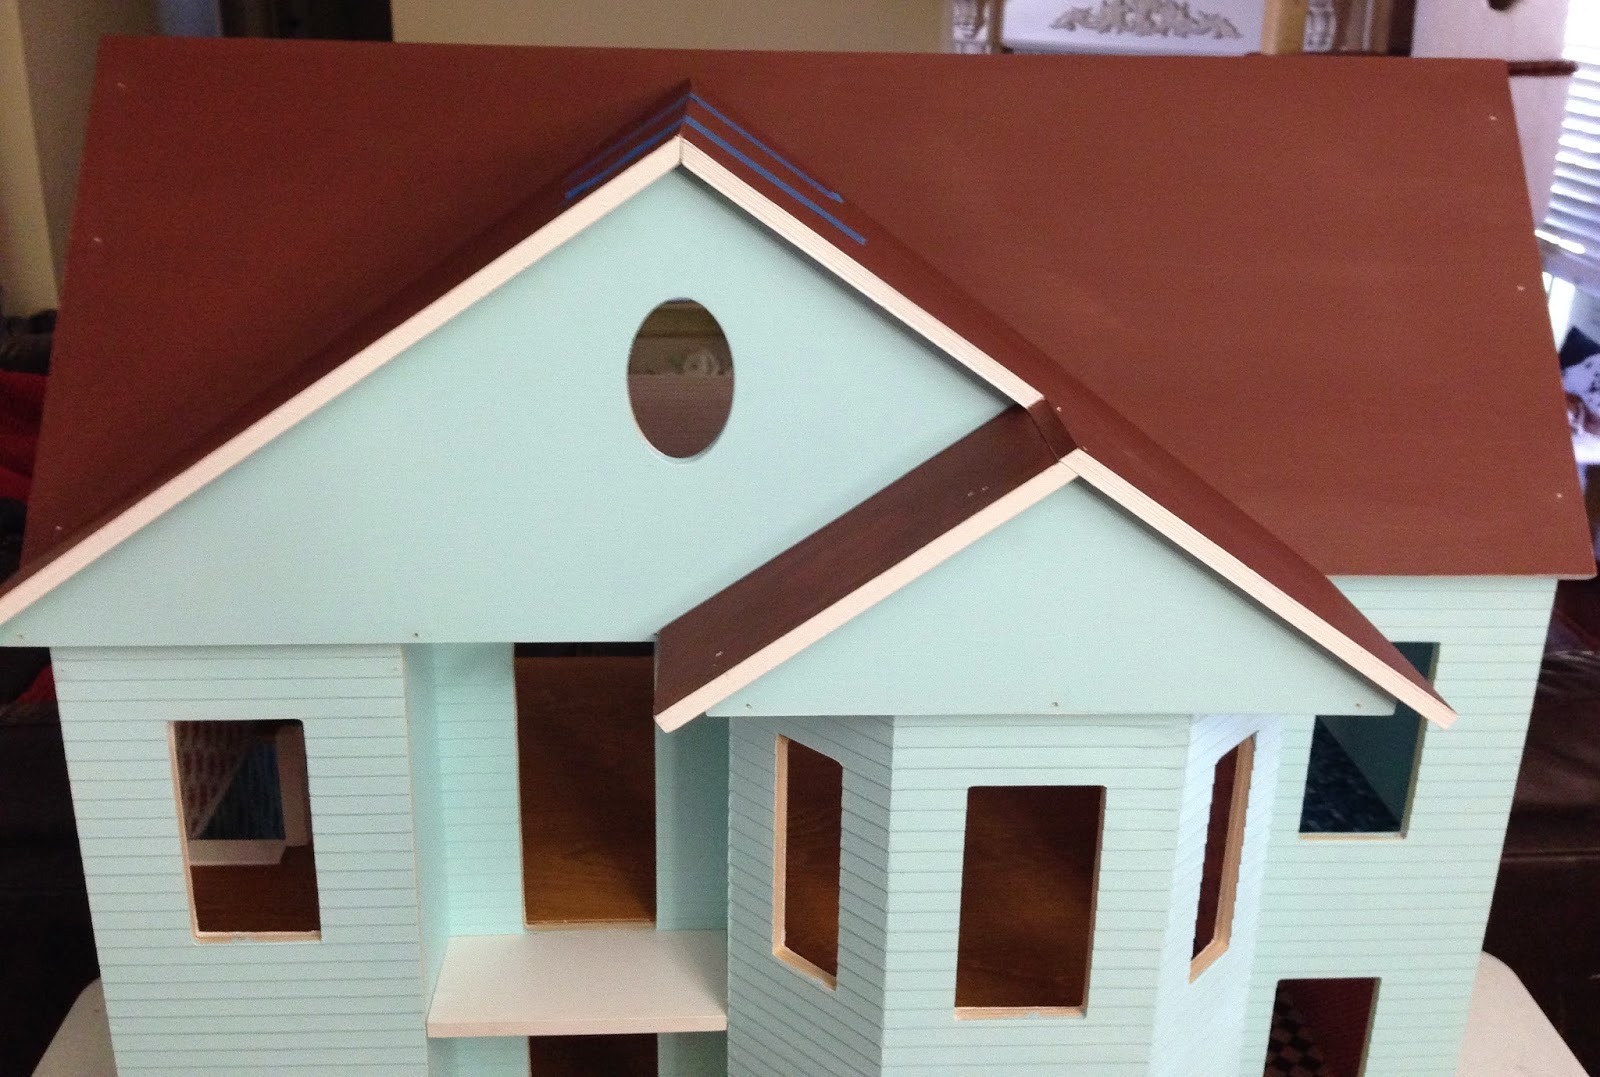
Originally, I had primed the roof white, like the rest of the house. Then I read that white could show through in between the shingles, so I painted the roof brown. I decided to go with wooden shingles that have an octagonal edge. Since the kit did not include the shingles, I bought two bags of 350 shingles from Hobby Lobby. At first, I was planning to stain the shingles, but decided I like the look of the natural color, which is much lighter than the brown I had painted the roof. The darker color won't show through in between the shingles, but you might be able to see the darker color under the edge of the shingles that are around the outside. So I painted around the edges with a lighter brown, closer to the shingle color. My sweet husband, who has put together the structure of this dollhouse since it required nailing (I don't do nailing), started laying the shingles. He drew guide lines on the roof 3/4" apart with a pencil to mark where the rows of shingles will go. We are using Fast Grab Tacky Glue to glue the shingles in place.


While he was working on the shingles, I started installing the exterior doors, windows, and trim.  Upstairs there's a little balcony.  I glued on the french door, corner molding edge trim, and the balcony railing.  All of the house trim is painted off-white. 


The front door was next.  I had painted the front door the darker Island Blue trim color.  All of the doors and windows have clear plexiglass panes that had to be slid into a slot in the wood before gluing them in place.  You can see some of the shingles strewn about in this picture.  


 I also glued tiny brass and crystal door knobs on the inside and outside of the front door and the balcony french door.  I ordered the knobs from eBay.


Next to go in, was the oval window in the front gable of the roof.


I had been researching how to shingle a dollhouse all week, but I still didn't feel comfortable that I could do it.  Since the shingles didn't need to be nailed in place, I thought I would be gluing them myself. Once my husband finished nailing the last parts of the roof together though, he told me to go get the shingles.  I started telling him all that I had learned about shingling the roof, and his response was "Don't worry, I know how to do this - it's just like a regular size house".   


I am so relieved that he took on this part of the build.  I was really worried about cutting all the shingles to fit into the valleys on this roof.  It's no problem for him though. He can cut the shingles to a perfect fit (it appears without even thinking about it).  It's like second nature to him.


I finished gluing in all ten windows. I used a combination of Fast Grab Tacky along with a few dots of  Zap-a-Gap to glue the doors, windows, and trim.  


All the corners of the exterior got a white corner molding trim.


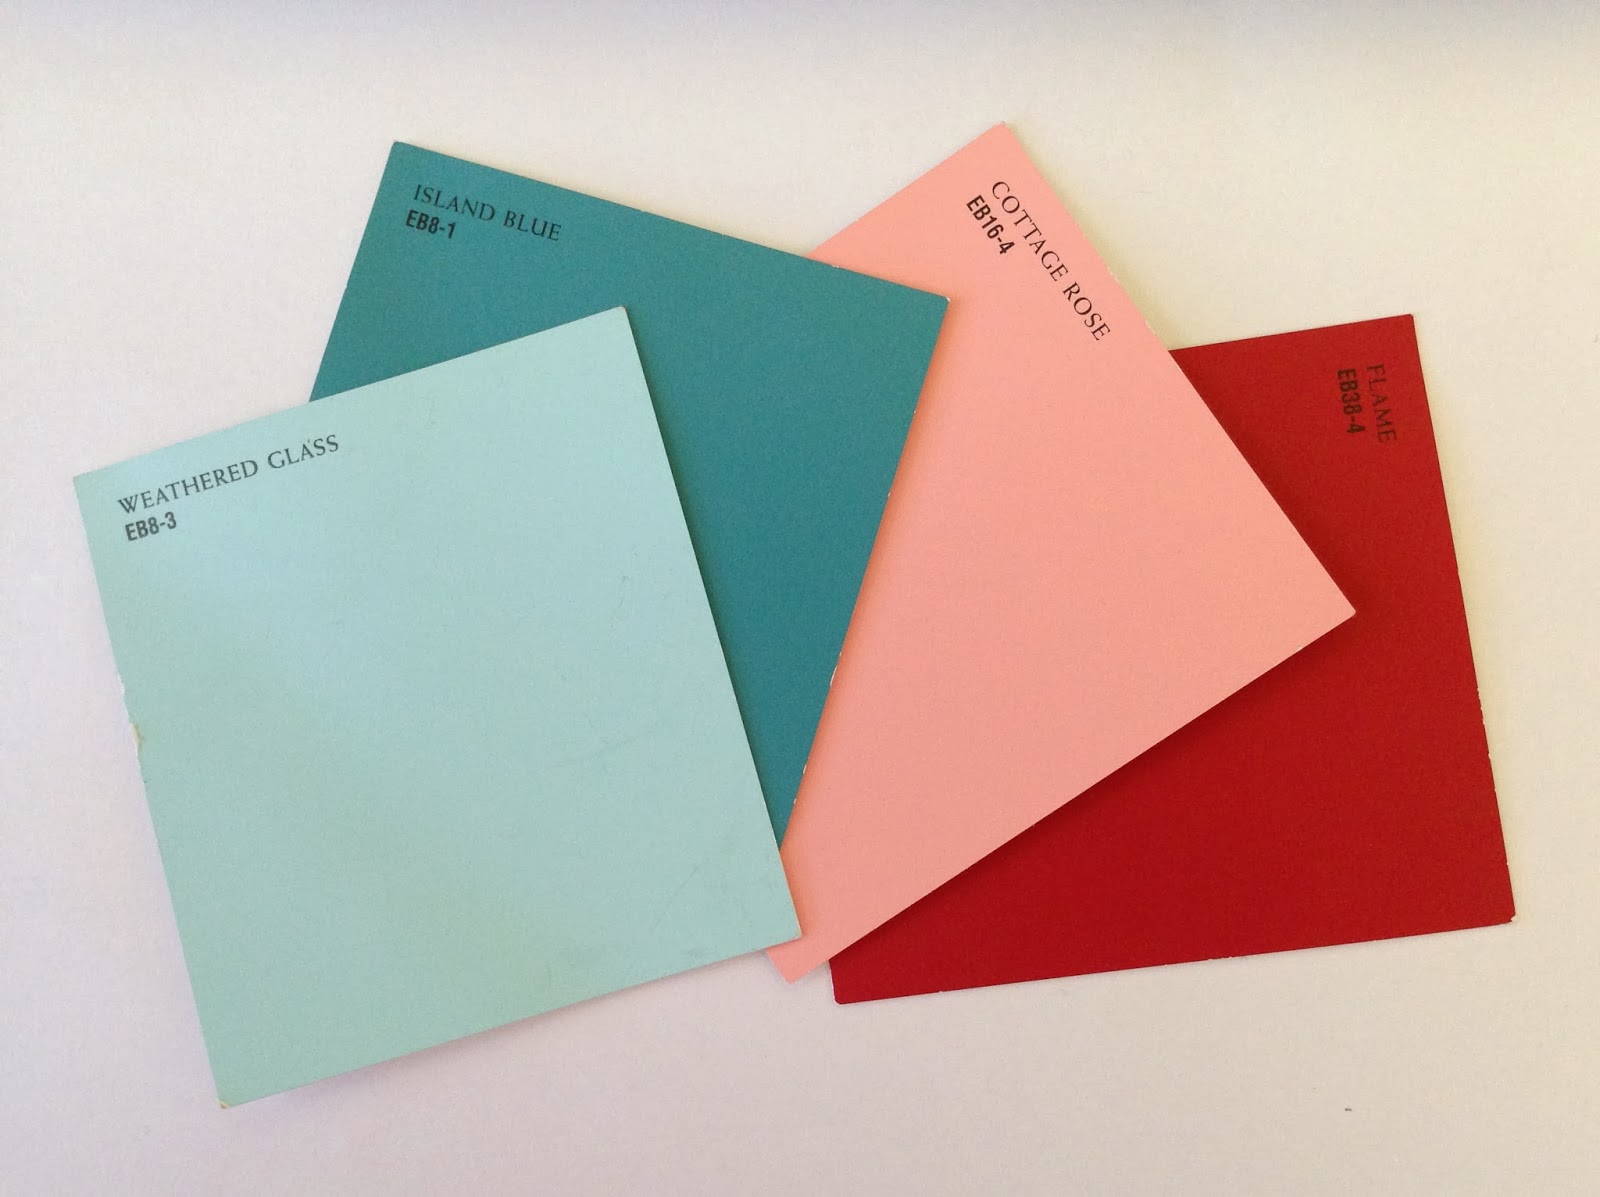
I wanted to add some more of the Island Blue trim color to the outside of the house.  I found these adorable little shutters at Hobby Lobby and painted them Island Blue.  So to finish off the front trim, I started gluing the shutters in place.


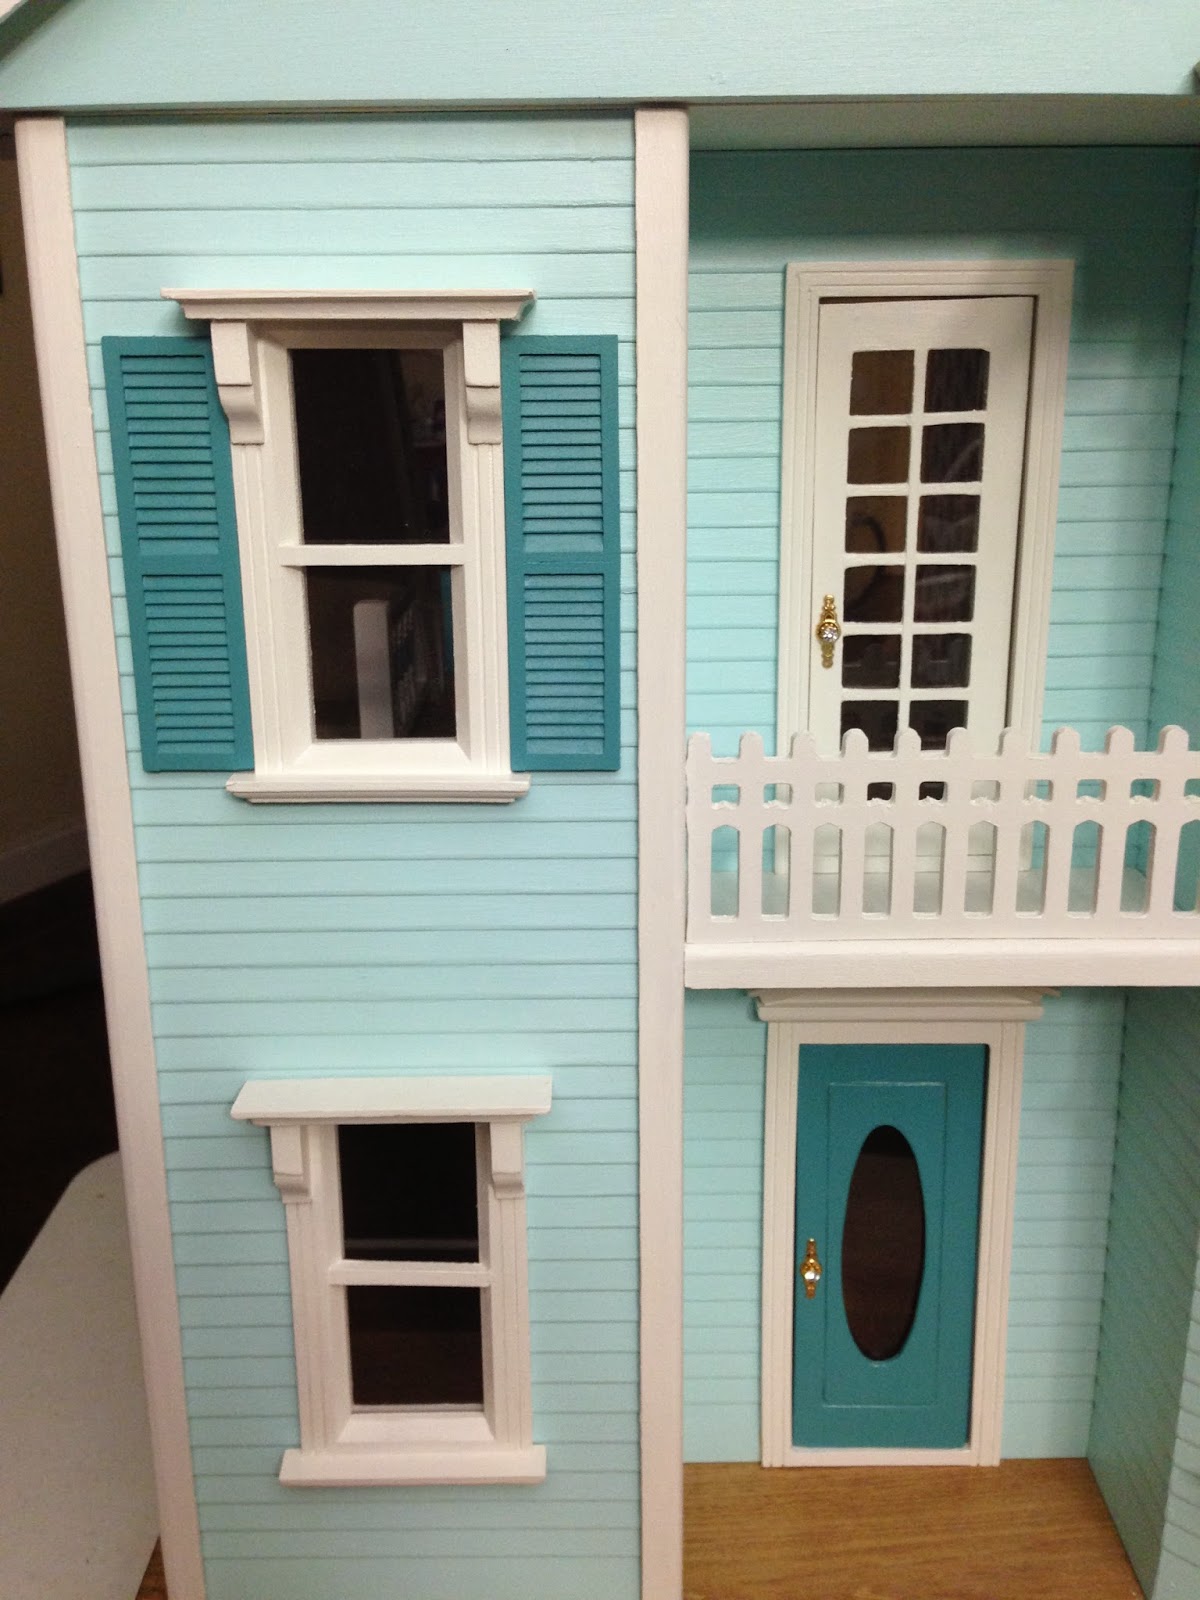
I added four sets of shutters to the outer windows.  The walls around the bay windows aren't wide enough for shutters.  It's easier to buy four sets of shutters than ten sets anyway.  I like the look of the shutters just on the outer windows, and I like the pop of color.  


We got almost half of the shingles done.  My hubby is working today, but hopefully he will have time to work on it some more in the evenings this week.  


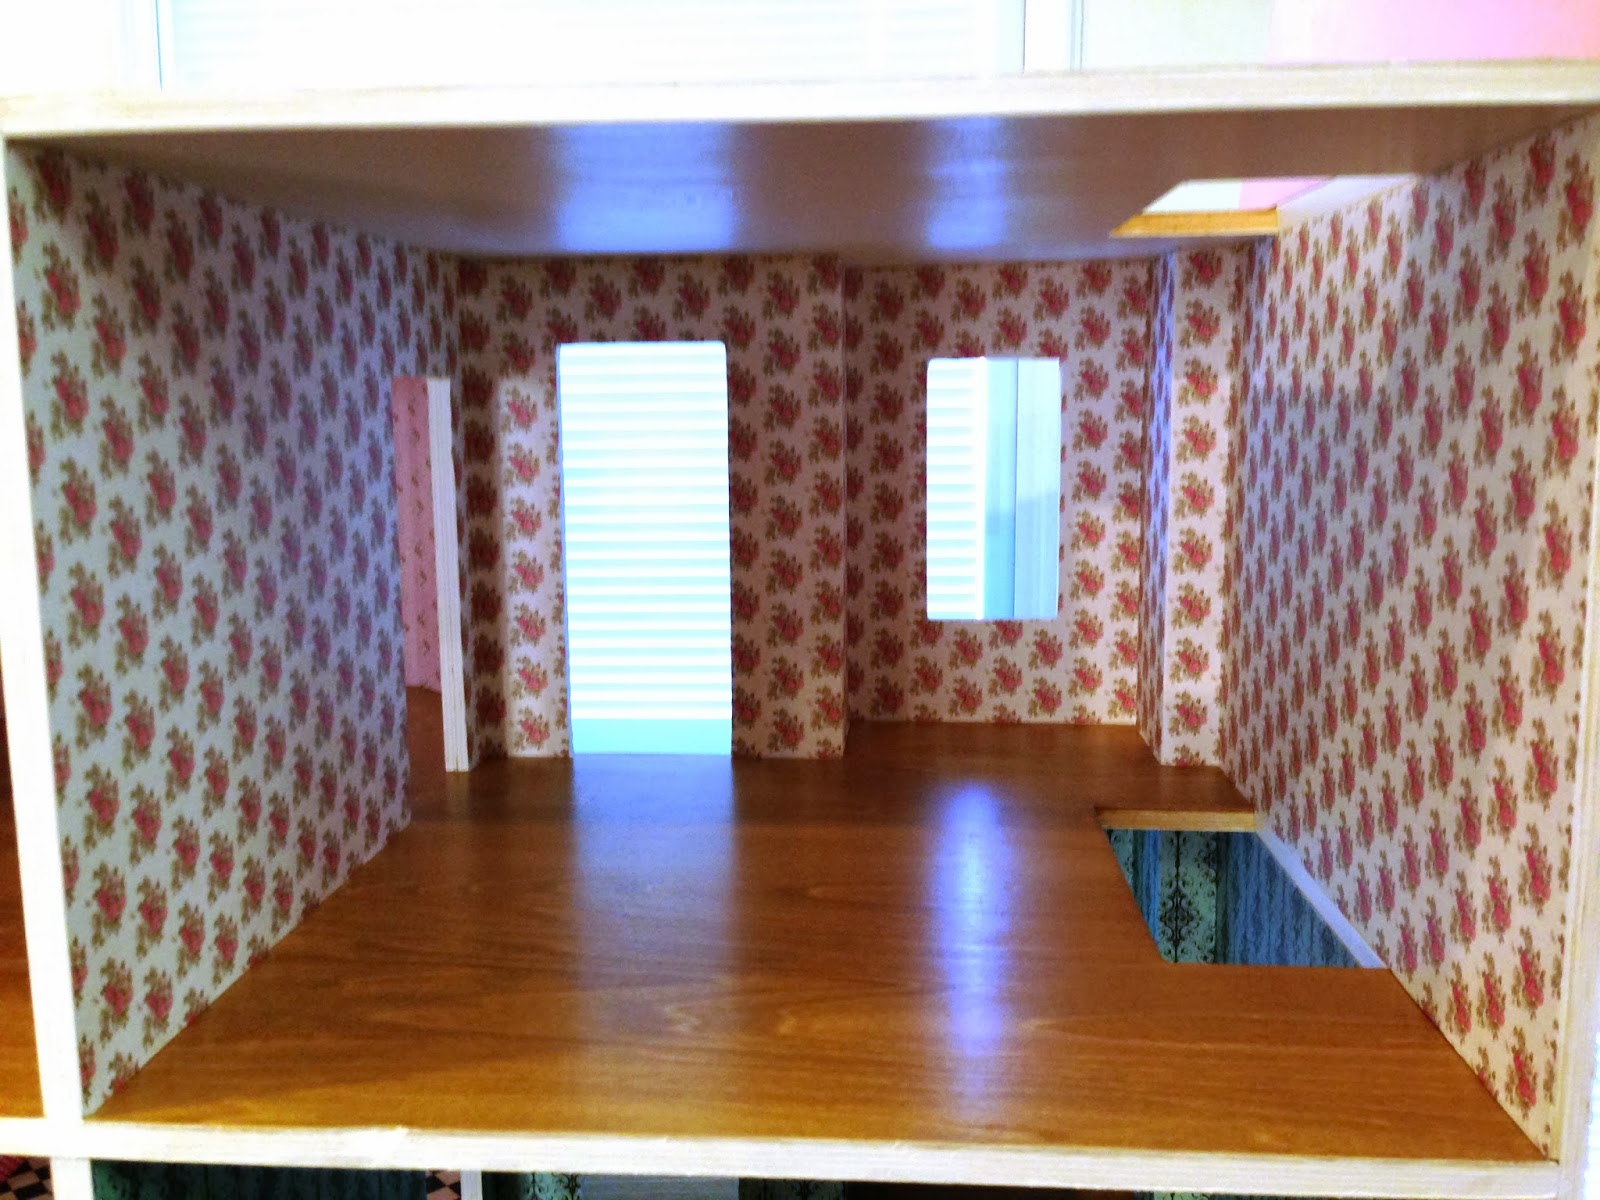
Once the roof was on, I was able to work inside on the third floor.  I found a fairy print dollhouse wallpaper on ebay for the third floor.  


I wallpapered the back walls with the fairy print paper and painted the side walls Cottage Rose.


Here's a view of the living room with the front door installed. I still need to add the trim.


Here's the french door upstairs that opens out onto the balcony.


Current view of the inside progress.

The next decision I'm trying to make is what to do with the area on the base in front of the house. I can't figure out if this area is supposed to be a porch or the yard. In the picture on the dollhouse box, it is painted white like a porch, but there is no roof over it like a porch would usually have. There is a fence or railing that goes around the edge that I have painted white. If I make it a porch, I could add some rocking chairs out there, but if I make it the yard, I could add some flower beds with plants. I know I don't want to leave it stained brown the way it is now. I am thinking about doing a flagstone treatment on it or on part of it. I'm not really sure how I could make it look like a yard with grass and flower beds yet.  

What do you think this area should be?  A front porch or the front yard?  I'd love to hear your thoughts and ideas.

I hope you are having a wonderful, blessed weekend!

Thursday, March 13, 2014

Building a Dollhouse, Part 2

I just wanted to post an update on the progress of the dollhouse.  I've been working on the dollhouse for about 3 weeks now.   After priming all the pieces, I knew I wanted to paint most of them before assembly, so I had to choose a color scheme even before building.  I knew I wanted a cottage style and a bit of Mary Engelbreit style.  When I found these paint colors at Lowes, they just spoke to me, and I knew this was it.  They are from the Valspar Eddie Bauer Home Collection.  I bought a 7.5 oz. Satin paint sample of each color, plus an off-white for the trim. The colors are Weathered Glass, Island Blue, Cottage Rose, and Flame.


The exterior of the house is Weathered Glass and there will be off-white and Island Blue trim.  The shell of the house is painted and built.  We still have to build the roof and install the windows, doors, and the rest of the trim.


Inside the house, I'm also painting and wallpapering as I go.  Well, I've been painting before building, but wallpapering after building.  I am using Yes Paste to adhere all the wallpapers to the primed walls.  Yes Paste is a book binding paste, so it is great for a really smooth finish.  Since it is a really thick paste, there's not a lot of water in it like other glues, which would cause paper to wrinkle.  I could only find the Yes Paste at Michaels.

The kitchen has red and white gingham wallpaper, which is actually scrapbook paper.  The kitchen floor is covered with a black and white checkerboard scrapbook paper.  I applied about 5 coats of Gloss Mod Podge to the floor to give it a shiny tile finish.  


In the back of the kitchen, there is a bay window, which will be the dining area.  I used some Mary Engelbreit scrapbook paper that has been in my stash for years for the dining area.  I haven't been able to find any ME scrapbook paper in the craft stores lately, although I do see a few other ME items.


The living room has teal scrapbook paper on the walls.  The floor is the original dollhouse floor, which I stained with Minwax Light Oak and applied 2 coats of Satin Polycrylic.  


On the second floor,  the room above the living room has a rose print wallpaper. This paper is actually dollhouse wallpaper.  It came in a roll in the dollhouse section at Hobby Lobby.  


This bedroom has a pink floral print on the walls, which was also a dollhouse wallpaper from Hobby Lobby. The floors in these two second floor rooms have the original dollhouse floors with stain and poly, like the living room.  


The bathroom walls are painted Weathered Glass.  The floor is a tile print scrapbook paper with 5 coats of Gloss Mod Podge applied to make it shine.


The third floor is one big room.  Some of the walls will be painted Cottage Rose and some walls will be wallpapered.  The floor was also stained, but I decided to give it a different treatment.  I scribed floor boards onto the stained dollhouse floor with a straight edge and a pen.  Then I distressed the floor by banging it with the edge of one of my Quick-Grip Clamps that was handy, since we had been using them to clamp parts together until glue dried.  My husband came in to see what all the noise was, and his reaction was priceless when he saw me banging recklessly on the dollhouse. He must have thought I was losing it.  :)  I explained to him that I wanted the floor to look distressed. Then I mixed a little of the off-white paint with water to thin it down and brushed it over the floor to give it a white washed effect.  


Once the wallpaper was in, it was time to install the stairs.  I had a really hard time deciding whether to stain the stairs to match the floors or paint them.  I finally decided to paint the stairs off-white to match the trim.  I painted the railing and part of each spindle with the Island Blue.  Here is the living room staircase.


This is the 2nd floor staircase in the room with the rose print wallpaper.


I don't have much furniture for the house yet. I'm realizing now that the house is coming together, and I'm going to need to furnish it very soon.  Last weekend, we went to Mississippi, and we stopped by Treasure Hunt, which is a closeout store like Tuesday Morning or Big Lots.  They had a Melissa and Doug dining room set which was $29.99 for 60% off, so I got it for $12.  It included a table and 4 chairs and a china cabinet.  The pieces are stained a mahogany finish and the chairs have red cushions.  I'm not sure the style works in my cottage style house, but I couldn't pass it up for just $12.  Maybe I should repaint the set in an off-white to make is more cottage style.  What do you think?


I also picked up this little old fashioned stove at Hobby Lobby, but I just don't know if it will work with this furniture.  The stove was $7.99, but with the 40% off coupon, it was only $4.79.  Even if I don't use the little stove in this house, I'm sure I'll keep it. It is so cute, I could just display it in my own kitchen. I still don't have any cabinets, a sink or a refrigerator for the kitchen yet.  I haven't been able to find a cottage style set like I have in mind. If you have any suggestions or ideas, I'd love to hear your thoughts!


Here's a current view of the inside of the dollhouse.  


Next, we will be building the roof and installing the doors, windows, shingles, and trim.   


Meet Amelia Thimble from Wilde Imagination

Please help me welcome Amelia Thimble.  Amelia is a ball jointed doll (or BJD) from Wilde Imagination. She arrived in a tiny yellow box with green polka dots and an adorable sketch of Amelia holding a needle and thread in one hand and a button in the other hand.  Sew cute!


Of course, Twinkle wanted to be at the box opening to be the first to meet Amelia and welcome her to her new home.

Yay!!!  She's here!!!

It was such a long trip!

Here, let me help you out of there.

You rescued me!  Thanks!

Amelia is made of resin and has 14 points of articulation.  She stands 4" tall, just a little taller than Twinkle.

It's so nice to finally meet you!

These two are going to be fast friends.


Amelia has inset green-grey eyes that can be changed.  She has a chestnut wig, and her hair can easily be changed to a completely different wig.  I love the versatility of wigs.  It is so easy to pop a new wig on a doll if you get bored with how she looks, and it's like having a totally different doll. 


Patience, who is also from Wilde Imagination, was there to welcome Amelia home too.


Amelia looks so tiny in comparison to Patience.  I thought they might look like sisters, since they are both redheads,  but Amelia's hair is more auburn and Patience is more of a carrot-top.


Patience is going to have her hands full with these two.


Twinkle couldn't wait to show Amelia around the fairy house.


Time to get busy crafting some clothes and accessories for Amelia, with her help of course.  Amelia loves crafts, sewing, knitting, anything sew crafty.  She would feel right at home in a sewing basket among the buttons and spools of thread.  Her name is Amelia Thimble, after all.